
Valentine's Potty Box:
Level of Difficulty: Easy
Material Used:
Small white trashcan (about $1 at Goodwill)
Large white plastic bowl (less than $1 at Goodwill)
Cardboard (a combination of an inadequate description on the part of USPS.com and a lapse of common sense on mine, I am the proud owner of 10 packs of 25 large board game sized flat-rate shipping boxes. Many of my crafts utilize this abundant resource)
Rectangular disposable plastic container (I had one in my recycling)
1-2 rolls of white duck Tape
Colored permanent markers
Scissors
Box Cutter (more useful than scissor for some cuts)
Craft Glue
Newspaper, a sharpened pencil and toilet paper (accessories)
Glitter Glue (optional)
Step 1: First tape the bowl on top of the plastic rectangular container. Then tape that to the upright trashcan. There will be a gap between the rectangle container and the trashcan. You can tape over the gap in the next step.

Step 2: Cover the outside of the containers with white duck tape. Use the tape to bridge the gap between the trashcan and plastic rectangle to form the tank and base of the toilet. Do not tape over the top of the bowl or trashcan.
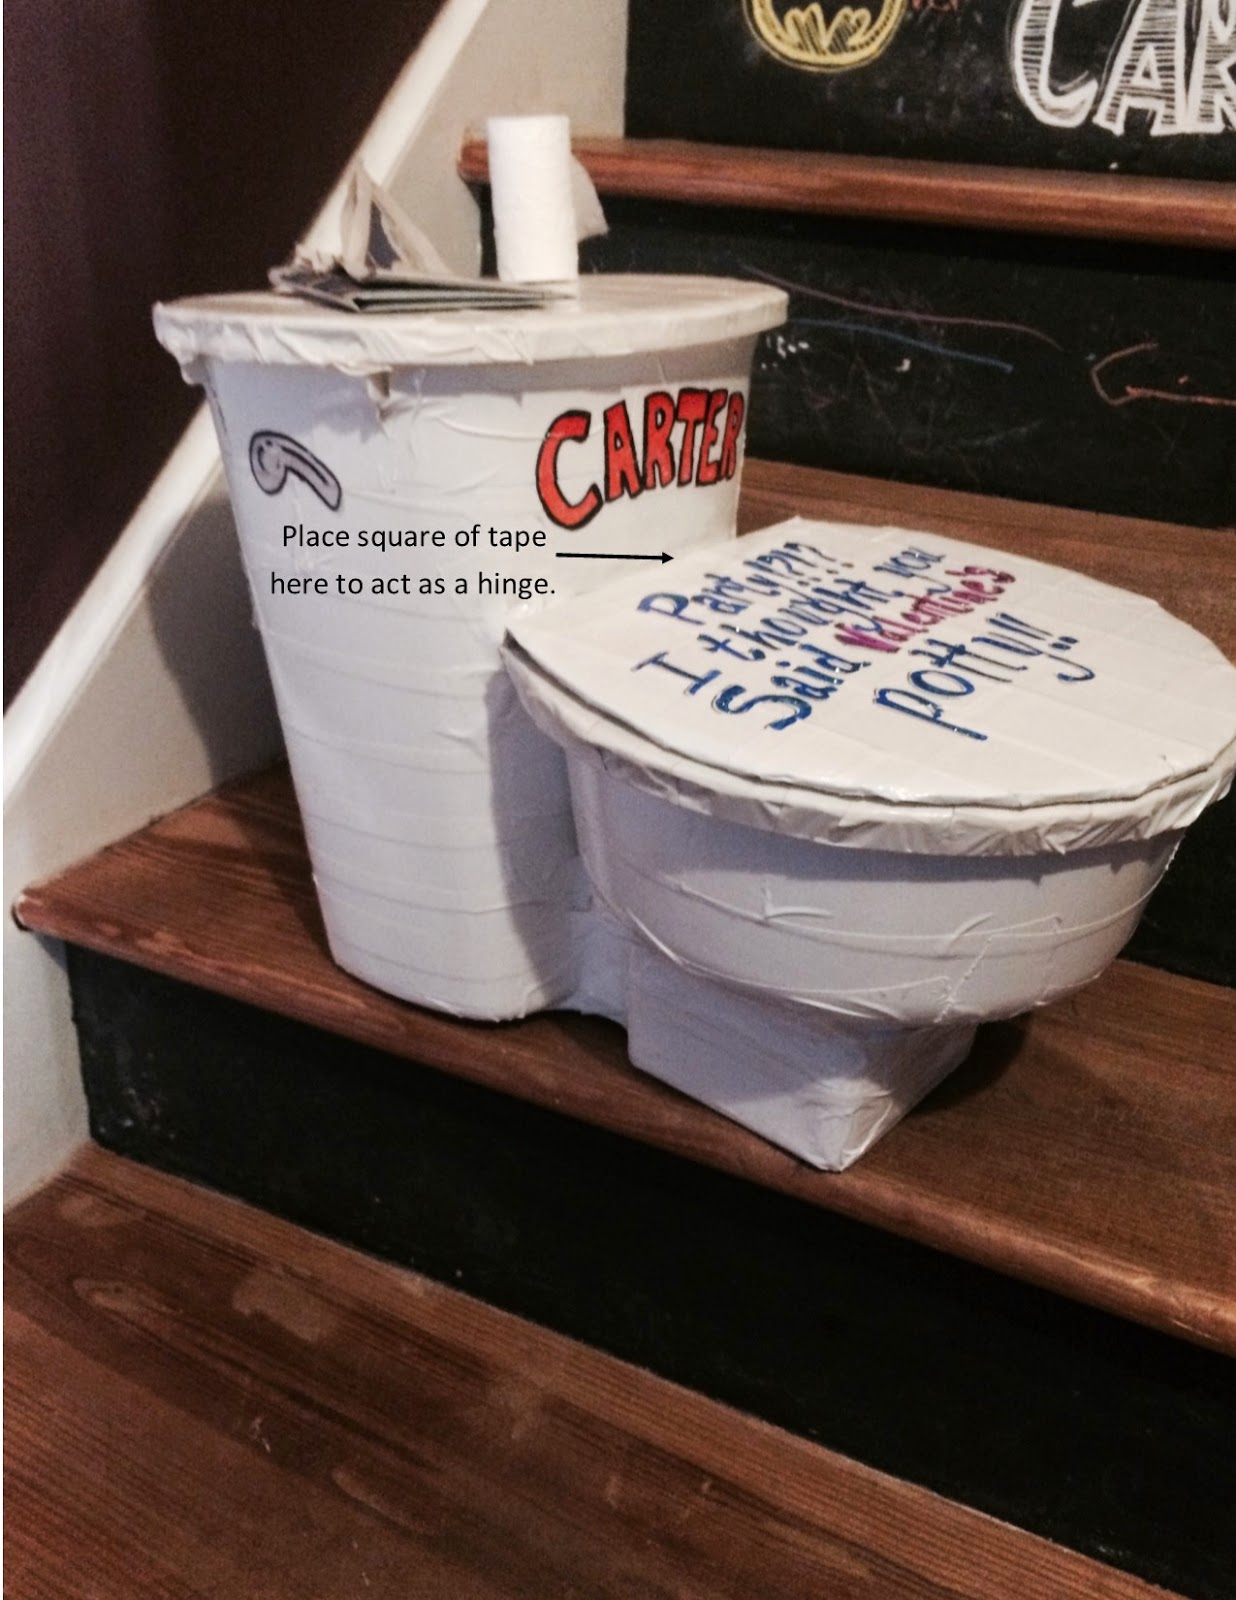
Step 3: Cut toilet lid shape out of cardboard and cover in white duck tape. Secure the lid to the white bowl with a 1-2 inch piece of tape. It will act like a hinge to allow for the lid to open and close.
Step 4: Cut a piece of cardboard large enough to cover the top of the trashcan. Tape the cardboard to the top of the trashcan, covering the entire area with white duck tape.
Step 5: Using permanent marker, draw on flush handle and any other embellishments that you desire. I used glitter glue to outline the words I drew.

Step 6: Cut out a section of newspaper and glue it to the lid of the toilet (I used a part of the Sunday comics).
Step 7: Remove a long section of toilet paper, being careful to not pull the squares apart. Wrap the paper tightly around the pencil. Slide the roll half way off of the eraser side of the pencil. Using scissor, cut off the last third of the roll. This will create a smaller, scale size roll of toilet paper. Squeeze a small amount of glue into the center of the roll, securing it to the pencil. Once dry, punch the sharp end of the pencil into the lip of the trashcan tank.
Step 8: Prepare to continuously yell at your 3 1/2 year old because he want to use the new potty!!!!!!!
This idea is the $#*+!
ReplyDelete